The lovely Louise asked me to make a little tutorial to show how I made my felt flowers. This is my first attempt at a tutorial, so please be gentle with me….
I apologise for the layout of this blog, I have had many problems getting the pictures and wording in the right places, will try harder next time.
Felty Flowers
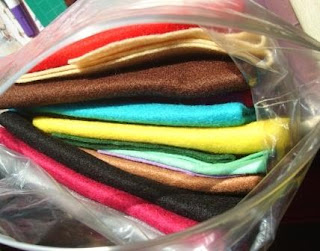
For these flowers I have cut a strip of felt the full length of the felt square and about 3-4 cm high.

Cut the felt in a gentle curving wave to give some shape to the finished flower.
At each end cut the felt to a curved point (so you don’t have a blunt squared end petal).

Now, using a strong cotton start with a running stitch close to the bottom of the felt (about 3-5 mm).
I have used a contrasting coloured cotton for illustration purposes only, I would suggest you use a cotton to match your flower, but it should not really matter as the sewing should not be visible on the flower once it’s finished.
For the pansy type flowers:
Continue the running stitch to the end of the felt and gently gather the felt as you go, make this as loose or tight as you like, the more tight the gather, the smaller the finished flower will be.

Tie your cotton off and you should now have a curly wiggly felt spring type thing (…well, you can’t accuse me of being too technical).
Now gather the felt into a flower shape, curling it over itself (like orange peel) until you get a flower shape you are happy with. Stitch it in place with a few stitches at the back. Don’t worry of there is a little hole in the middle of your flower we can fix this next.

If you have a hole left, cut a small flower shape from your scrap felt in a contrasting colour and attach this to the middle of the flower with a couple of stitches. Hide your stitches in the middle by adding a small bead or button to the centre of your flower. If there is no hole just add a button or bead.
 For the rose flowers:

Very similar to the above method except that you gather and sew as you go.
Start curling the felt round itself to make a rosebud shape, every couple of turns add a stitch to the bottom to keep it in place.

Every few turns fold the felt back on itself for about 1 to1.5 cm and stitch this in place.
Continue curling to make your rose. Tie your cotton off underneath and you are done!

 Leaves
If you want to add leaves, these are really simple to make.

Cut green or brown felt into a double leaf shape, I just do this freehand and get all kinds of weird and wonderful leaf shapes.
With embroidery cotton backstitch your veins onto the leaf in a contrasting colour and tie off on the back.

You can then fold the leaves to be next to each other or have one each side of your flower.
Simply tack these onto the back of your flower and you are done!

Hope you were able to make sense of this, if not let me know and I will try to make it make sense (see what I mean).
Luv Kandi x


 It started with a drawing I made of what I wanted (promise not to laugh, I can’t draw but sometimes do when I get an idea in my head):
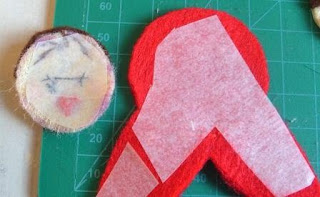
 From here I cut the template out:


 Next you need to cut the last bits of felt you will need which consist of a little flower for your doll’s dress, the tie part of her headscarf (from the scrap bit you had earlier) and some cheeks:


 Then to assemble it all:
 The face is attached to the headscarf, dress attached to the body, headscarf attached on top of the dress. The face and headscarf were then sewn to the body with little stitches.
 Then stitch her up!


 A little felt and fabric matryoshka key ring (or bag charm).


